
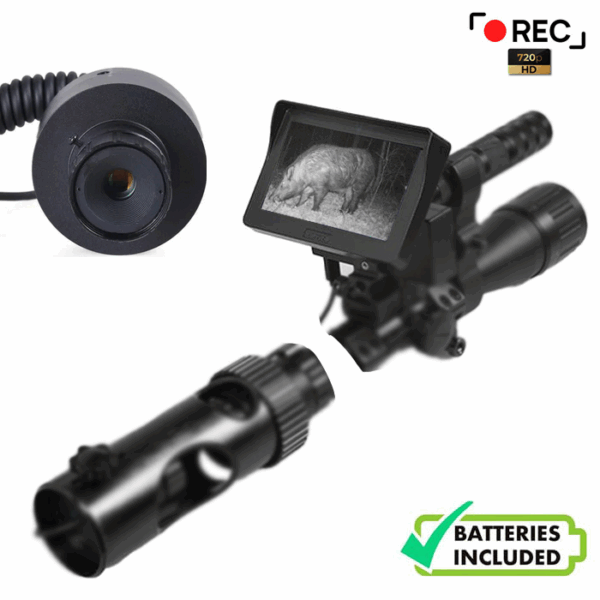
A night vision setup lets you watch and identify hogs, coyotes and other predators after dark. This guide explains the main types, what the numbers mean and what to check before you buy.
First, check your local rules
Rules for hunting at night, and for using artificial light, night vision or thermal equipment, differ from state to state and often by species and season. Check the current regulations from your state wildlife agency before you buy or hunt.
The three ways to see in the dark
- Digital night vision uses a camera sensor that is sensitive to infrared light, plus an infrared illuminator that lights the scene with light your eyes cannot see. It shows real detail such as ears, legs and brush, works in daylight too, and costs far less than the alternatives.
- Thermal shows heat rather than light. It is the best tool for spotting an animal quickly, even in grass or light fog, but it shows less detail for identification and costs much more.
- Traditional image-intensifier tubes amplify existing light. Good tubes are excellent and expensive, and they can be damaged by bright light.
Dedicated scope or add-on kit?
A dedicated night vision scope replaces your day scope. An add-on kit keeps the scope you already own: a small camera clamps behind the eyepiece and sends the picture to a screen mounted on top, while an infrared light lights the target. The NV-7933 Pro V3 is an add-on kit of this kind.
The advantage of an add-on is that you keep your zero, because you are still aiming through the same scope and reticle. Confirm it at the range anyway, in daylight and again in the dark, before you hunt with it.
Understanding the infrared light
- 850 nm illuminators reach farther. The emitter shows a faint red glow if you look straight at it.
- 940 nm illuminators are almost invisible but give noticeably less range with the same power.
- A focusable beam helps: wide for scanning, tight for a longer look.
Range figures describe good conditions. Humidity, dust, rain and tall grass all scatter infrared light and shorten the distance at which you can make out an animal. Plan around the distance at which you can clearly identify your target and see what is behind it, not the farthest distance at which something shows up on the screen.
What to check before you buy an add-on kit
- Eyepiece size. Measure the outside diameter of your scope’s eyepiece and compare it with the adapter size given on the product page.
- Recoil. Screens and camera mounts have limits. Follow the caliber guidance on the product page and tighten every mount as instructed.
- Batteries. Most kits run on rechargeable 18650 cells. Charge them before every outing and carry spares, because cold weather shortens run time.
- Recording. If you want video or photos of the hunt, check that the screen unit records and what card it uses.
- Rifle action. A screen mounted over the scope can crowd the bolt handle on some bolt-action rifles. Dry-fit everything before you sight in.
Setting up for the first time
- Assemble and focus the camera in daylight, when it is easy to see what you are doing.
- Set the scope to a low magnification first; the picture is brighter and the field of view wider.
- Aim the infrared light so its bright center sits on the reticle at your usual shooting distance.
- Practice finding and following a target on the screen before you take it hunting.
Safety
Night vision does not change the basic rules. Identify the animal with certainty, know what lies beyond it, and never shoot at eyes or movement alone.